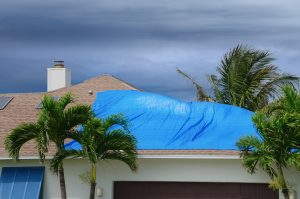
Tarping Your Roof After a Storm: Why, When, and How

Homeowners have few choices for protecting their roofs before or during hurricanes and bad storms. Once the winds have died down and the storms pass, insurance companies expect you to do everything you can to prevent further damage to the roof, the home’s interior, and the contents of the home to minimize additional losses. Tarps are an ideal temporary solution.
Like other projects done around the house, safety should always come first. Have at least one additional set of hands to help with the project and avoid standing on a roof with a steep pitch, standing on the tarp, or climbing on the roof during the storm. Before and during the tarping process, keep these helpful tips from Carroll Bradford Roofing in mind.
Why Use a Tarp
When you’re preparing for a big storm, you can board up windows and doors for added protection from wind, rain, and debris, but there are fewer options when it comes to protecting your roof. Not only is the roof one of the most exposed parts of your home, it’s among the most expensive to repair, which is why using a tarp makes good sense. Reasons to tarp a roof include:
- Stability: Stabilizing the interior beneath a damaged roof allows extra time to make repairs and remove possessions and important items
- Time: Provides additional time to find the right roofing contractor and decide on a course of action
- Money: Reduces restoration costs by protecting the remainder of the roof and the interior of the home from the elements
- Insurance: After a roof is damaged, a tarp allays an insurance company’s chief concern about minimizing additional damage to the home
When to Tarp a Roof
Depending on the severity of the storm or the incident that caused the roof damage, tarping the roof may be a homeowner’s only alternative until a trusted roofing contractor can come to survey the damage and create a plan. Signs a tarp is needed aren’t always evident. Here are a few things to look for in addition to obvious, large-scale roofing damage:
- Interior leaks or evidence of water damage
- Missing, loose, or broken shingles
- Missing or dented panels, broken tiles, or dented vents
- Broken skylights
How to Tarp a Roof
In addition to a heavy-duty tarp that’s large enough to cover the damaged area by at least three feet on every side, you’ll also need a ladder, 2×4 boards, and 3 ¼-inch nails. To tarp a roof like a pro, follow these easy steps:
- Clear all debris from the area so you can see the extent of the damage and easily locate leaks. While you’re at it, note any damaged or missing shingles.
- Measure the area you need to cover with a tarp to make sure you use one of the right sizes.
- Partially unroll the tarp and wrap one end around a 2×4 board placed against the roof to prevent it from collecting water or debris.
- Nail the tarp to the 2×4 before nailing another 2×4 on top to sandwich the tarp.
- Place this along the eaves line, stretching the tarp so it continues over the ridge and the other side of the roof.
- Repeat this on the other end of the tarp, nailing it to the roof before nailing a few 2x4s into the sides of the tarp to anchor it in place.
- Secure the edges by attaching 2×4 boards to the tarp’s overhang to keep water out of the tarp.
Once you’ve tarped the roof, call a trusted roofing professional such as Carroll Bradford Roofing. Years of experience make this Florida construction solutions provider a leader in the field and an ideal go-to resource for everything roof related. Contact us today to learn more or to schedule an estimate.
References:
https://images.lowes.com/animate/hurricane/hur06_rooftarp.pdf
https://grizzlytarps.com/blog/tarp-roof-like-pro/
http://thehtrc.com/2013/diy-emergency-roof-tarping

